If you’re tired of your kitchen or bathroom and want to liven up the place, you might want to consider cabinet painting as an easy solution. Painting your cabinets can be a great way to freshen up your kitchen and add value to your home without the hassle and cost of a whole remodel.
Before you jump into a cabinet painting project, make sure you have a good idea of what to do and how to do it. You don’t want to get partway into the process and realize you don’t have a clue what to do next.
So, from start to finish, here is everything you ever needed to know about cabinet painting.
Equipment
Esteemed American psychologist Abraham Maslow once said, “To the man who only has a hammer, everything he encounters begins to look like a nail.” While you might need a hammer somewhere in the process of painting your cabinets, this job requires some finesse and precise attention to detail. And you are going to need more than just a hammer.
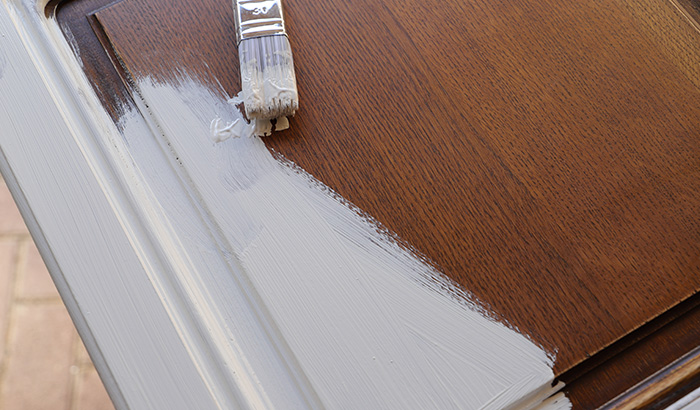
Obviously, you will need a paintbrush, but knowing which tools are most effective for the project is essential. Consulting a professional can go a long way to ensure the final presentation is everything you dreamed of.
From brushes and rollers to safety gear and protective coverings, having the right equipment for each step of the project is crucial.
It is equally as important to make sure that you are using the correct type of paint for the look and purpose you are going for. If you dream of glossy black cabinets, you will need a specific kind of finish as part of your paint and possibly another layer of finish to go on top of that.
Not all paints will have the same effect, so be sure to know what type of paint you should use. Depending on the material of the cabinets, some paints may stick or dry differently than you expect. This is another reason to consider leaving this type of project to professionals.
Prepping your cabinets
Cleaning
While you probably clean your kitchen regularly, you probably don’t spend much time cleaning your cabinets. Over time, dust and grease can build up on the surface of your cabinets. All that gunk and grime need to be removed before you even begin to start cabinet painting.
Use a cloth with warm water and a kitchen degreasing product to clean the many surfaces of your cabinets. This may take a few repetitions to make sure the cabinets are thoroughly cleaned. Don’t forget to wipe off any dust that might be hiding in corners or places that are not often cleaned.
Hardware
During the cleaning process, you will also want to remove the hardware on your cabinets. Handles, knobs, pulls, hinges, locks, and latches must be removed before painting. A quick tip for reinstallation is to make sure each piece is labeled and kept together in a plastic bag or container with a lid.
It might be tempting to skip this part or just put some tape over the hardware, but this is a critical step. If the hardware is left on the cabinets, the paint can collect or clump around the edges instead of having a smooth surface for the hardware to sit on top of.
The good news is that this will also give you a chance to thoroughly clean your cabinetry hardware, which is the most often touched part of your cabinets. It is also an opportunity to replace broken pieces or even all of the hardware for a more dynamic change.
Removing
In addition to removing the hardware from the cabinets, you will also want to remove the cabinet drawers and doors from the shelving unit. This is time-consuming, but will pay off in the long run. Removing the doors and drawers will make it easier to paint them and prevent paint from getting where it shouldn’t be.
Once you remove the doors, you can move them to another location like a garage. That way you can keep as much wet paint out of the kitchen as possible and allow the pieces to dry without being in the way if you need to use your kitchen.
The Space
There is more to cabinet painting than just painting the doors and drawers. To do the job right, you also need to paint some of the space in and around the doors and drawers. Even after removing the main pieces of cabinetry, there is still some work required to prepare for painting.
Make sure to use painter’s tape to cover the remaining hardware, such as hinges or edges that should remain unpainted.
Cover countertops, floors, and appliances with plastic sheets or tarps to avoid drips or splatters. The beautiful blue color you picked will look great on your cabinets but probably not as great as a splotch on the dishwasher or drip marks on the countertop.
Sanding and Primer
Ok, you’ve cleaned your cabinets and finished removing doors, drawers, and hardware. The prep work is done, and you’re ready to paint, right? Well, not quite.
The next step is to sand the surfaces of your cabinets and apply a base coat of primer. Both parts of this step will allow you to apply thin layers of paint that will not only look better, but will last longer and prevent chipping or scratching over time.
Sanding ensures that the surface is smooth and paint will go on evenly in thin layers that will make your cabinets look great. Primer helps the paint stick to the surface and makes it so that fewer layers of paint are needed to cover the entire surface.
Curing
Kitchen and bathroom cabinets require more than just the paint itself. With daily use, these surfaces need a bit more protection, which is where the curing process comes in. There are different types of finishes for cabinet painting, but the most common for wood cabinets are lacquer and alkyne.
Alkyne and lacquer are very similar, but there are some pros and cons to each of them. Lacquer is more widely used because of its ease of use. However, like paint, lacquer can become brittle over time and eventually start to crack or peel. Alkyne is more difficult to work with, but is a bit thicker and more durable than lacquer as time goes on.
Whichever material you choose, finishes are essential to making your cabinet painting complete and looking beautiful.
Allen Brothers Cabinet Painting will do it right!
Located in Bluffdale and serving the surrounding areas of Salt Lake City, such as West Jordan, South Jordan, Sandy, and Draper, Allen Brothers Cabinet Painting can help with all your cabinet painting, refinishing, or restoring needs. Their expert team provides professional services and products to save time and money while guaranteeing customer satisfaction.
If you or someone you know is interested in updating your kitchen or bathroom cabinets, make sure you call Allen Brothers Cabinet Painting. Get a quote within 24 hours when you contact us today!