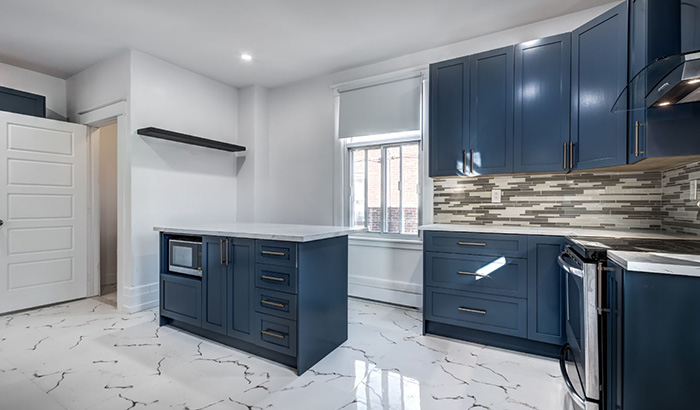
Imagine walking into your kitchen and feeling a rush of pride every time you see your cabinets. They look brand new, but guess what? You didn’t have to empty your wallet for a complete kitchen remodel.
Welcome to the world of cabinet refinishing, a game-changer for anyone wanting to spruce up their kitchen cabinets without the daunting cost and hassle of starting from scratch. This guide isn’t painting over the old; it’s about transforming what you already have into something you love.
Whether your cabinets are screaming for a color change or need a refresh, we’ve got you covered. Let’s look at how cabinet refinishing might be the perfect project for you and how it can turn your kitchen into the heart of your home, shining with new life and vibrancy.
Understanding cabinet refinishing
Before you decide, you need to know what cabinet refinishing involves. It’s more than slapping on a new coat of paint. You’ll clean, sand, and maybe even strip the old finish off your cabinets before applying a new one. This process can change the color or finish of your cabinets, making them look brand new.
Understanding the nuances of cabinet refinishing means recognizing its aesthetic value and its ability to extend the life of your kitchen cabinets. This method is sustainable, allowing you to reuse sturdy cabinets instead of sending them to a landfill.
Using the proper techniques, you can tackle minor damages like scratches or dents, ensuring your cabinets look new on the surface and gain refreshed durability and functionality. This depth of transformation goes beyond a surface level, injecting your kitchen remodel with a fresh vibe and potentially increasing your home’s value.
Step 1: Assess your cabinets’ condition
Take a good look at your cabinets. Are they sturdy? Do they function well? If they’re falling apart, refinishing might not be enough. But if they’re solid and you like your kitchen layout, refinishing could be perfect.
Consider the material of your cabinets as well, since some materials take longer to refinish than others. Check for signs of serious damage, like water damage or mold, which could require more than a cosmetic fix.
Evaluate the hardware and hinges; if they’re outdated or not working properly, you should replace them during the refinishing process. Finally, consider the design and color scheme you envision for your kitchen to ensure your current cabinets align with your renovation goals.
Step 2: Set your budget
Figure out how much you’re willing to spend. Refinishing is cheaper than buying new cabinets, but costs can add up. You’ll need materials like sandpaper, primer, paint, and maybe new hardware. Decide what you’re comfortable spending before you start.
Include a buffer in your budget for unexpected expenses often arising during home improvement projects. Research the price of high-quality materials to ensure your refinishing project lasts for years.
Consider if you’ll need to rent or purchase any special tools for the job, as this can impact your overall budget. Also, consider whether you’ll take time off work to complete the project, as lost earnings can add to the cost.
Step 3: Pick your finish
What look are you going for? Sleek and modern? Warm and rustic? Your choice of finish will set the tone for your kitchen remodel. Think about what will complement your home’s style and what you’ll love for years.
Explore the different sheens and durability options available for finishes. Some are better suited for high-traffic areas and easy cleaning. If you’re aiming for a unique or custom shade, mixing finishes might be an option to consider.
Investigate eco-friendly and low-VOC (volatile organic compounds) options to ensure a safer environment for your home. Additionally, look into the latest trends and technologies in cabinet finishes, as innovations may offer benefits like enhanced durability or ease of application that align with your project goals.

Step 4: Gather your materials
Once you have a plan, it’s time to shop. You’ll need tools and supplies like sandpaper, good quality primer, paint or stain, brushes, or sprayer. Don’t forget the little things like drop cloths and painter’s tape to protect your kitchen.
Make a checklist to ensure you don’t miss any essentials, including safety gear like goggles and masks to protect against dust and fumes. Consider additional lighting or portable fans to keep the area well-lit and ventilated during your project.
Research the best brands and types of brushes or sprayers for your chosen finish, as the right tool can significantly impact the quality of your work. Lastly, think about storage solutions for your materials and tools during and after the project to keep your workspace organized and safe.
Step 5: Prep your space
Get your kitchen ready. Clear out your cabinets and cover your counters and floors. Good prep work makes the process smoother and helps avoid messes.
Label doors and drawers as you remove them to ensure each piece goes back to its original location, simplifying reassembly. Use a gentle cleaner to wipe down surfaces before you start, removing any grease or dirt that could interfere with paint adhesion.
Block off the kitchen area from the rest of the house with plastic sheeting to prevent dust and paint fumes from spreading. Ensure you have adequate ventilation by opening windows or using fans to circulate air, keeping the workspace safe and comfortable.
Step 6: Clean and sand your cabinets
Start with a thorough cleaning to remove grease and grime. Then, sand your cabinets down. This step is crucial for making sure your new finish sticks.
After sanding, use a tack cloth or a damp rag to wipe away all the dust, ensuring the surfaces are clean and ready for primer or paint. If you’re working with detailed cabinet doors or intricate designs, consider using a sanding sponge that can get into crevices and around detailed work more effectively.
Step 7: Apply primer
Primer is like a magic layer that helps your paint or stain adhere better and last longer. Apply it carefully, following the directions on the can.
Allow the primer to dry fully before moving on to the next step, as rushing can result in a less durable finish. If your cabinets have a dark existing finish and you’re going lighter, consider applying a second coat of primer to ensure an even base and better color accuracy for your topcoat.
Step 8: Paint or stain your cabinets
Now, the fun part! Apply your paint or stain. Take your time, and do multiple thin coats for the best finish.
Always work in a well-ventilated area and start from the inner sections, moving outward to avoid leaving streaks or marks. When using paint, stir it well before each use to ensure color consistency throughout your project.
For staining, apply with a brush toward the wood grain, then wipe off excess with a clean rag for an even finish. Allow each coat to dry completely, checking the manufacturer’s recommended drying times before applying the next to prevent tackiness and ensure a smooth, professional appearance.
Step 9: Add the finishing touches
Once your paint or stain is dry, you can add new hardware. This step can make your cabinets pop and feel new.
Adjust and align the doors and drawers properly to ensure they close smoothly and fit well, enhancing your cabinets’ overall look and functionality. If you’ve chosen to update the hardware, selecting pieces that complement the new look of your cabinets can significantly impact the final aesthetic, tying the whole design together beautifully.

Step 10: Enjoy your new kitchen
Step back and look at your work. You’ve transformed your kitchen with your own two hands. Be proud and enjoy your refreshed space!
Invite friends or family over to show off your newly refinished cabinets and celebrate the hard work you’ve put into the transformation. Take before and after photos to share on social media or keep for yourself, reminding you of the significant change you’ve accomplished.
Consider throwing a small dinner party or a casual get-together in your revitalized kitchen space, making the most of the welcoming atmosphere you’ve created. Lastly, maintain your newly finished cabinets with regular cleaning and touch-ups as needed, ensuring they remain beautiful for years.
Alright, let’s wrap this up! You’ve come a long way from wondering whether your kitchen cabinets need a facelift to fully understanding the ins and outs of cabinet refinishing.
It’s not simply about slathering on some paint over the old stuff. It’s about seeing the potential in what you already own and transforming it into something that looks incredible and feels like a true extension of your personality and style.
This isn’t about following trends or doing what everyone else is doing. It’s about making a space that you love, speaks to you, and becomes a backdrop to the memories you’ll create in your home. It’s about that feeling of satisfaction when you look at your handiwork and think, “Yeah, I did that. And it looks awesome.”
Sure, the process might seem daunting at first. There might be moments of doubt, a splatter of paint, or a missed spot. But, remember, every stroke of the brush, every fine grain of sandpaper, brings you closer to that kitchen you’ve been dreaming of. It’s not only a project; it’s a testament to your dedication and creativity.
And when you finally step back to admire your work, you’ll realize it was all worth it. Your kitchen will not only be a place to cook meals but a space that genuinely feels like the heart of your home, infused with your unique touch.
So, go ahead, take that plunge. Dive into the world of cabinet refinishing with your head held high and a brush in your hand. Because, at the end of the day, this is more than a home improvement project.
You’re embarking on a journey to create a space you’re proud to call yours, a kitchen that sparkles with your flair. Let’s polish those cabinets until they shine; let’s turn your kitchen into a place that nurtures pots, pans, and dreams.
Let Allen Brothers do the hard work for you!
Allen Brothers Cabinet Painting stands out as the go-to expert when it comes to giving your kitchen a fresh look through cabinet refinishing. With our profound cabinet refinishing and painting expertise, we’ve mastered the art of transforming kitchens from drab to fab.
Our highly personalized approach recognizes that every kitchen has challenges and opportunities. From your first consultation to unveiling your revamped kitchen, our focus remains on capturing your vision and meticulously bringing it to life.
We’re not simply about making over your cabinets; we’re dedicated to elevating your kitchen’s look and functionality to meet your highest satisfaction. Opt for Allen Brothers Cabinet Painting to experience unmatched quality in cabinet refinishing. Let’s make your kitchen renovation dreams come true.
Contact Allen Brothers Cabinet Painting for a consultation, and let’s start crafting your kitchen’s future.