When any homeowner in Utah starts researching cabinet refinishing, the one question that comes up repeatedly to us is, does sanding kitchen cabinets really matter? We’ve painted over 1,500 kitchens across Salt Lake County and the answer is straightforward. Skipping sanding causes real problems, usually within the first year.
The difference between cabinets that last and cabinets that fail early comes down to surface preparation. Sanding isn’t optional. It really is the secret foundation of a durable finish.

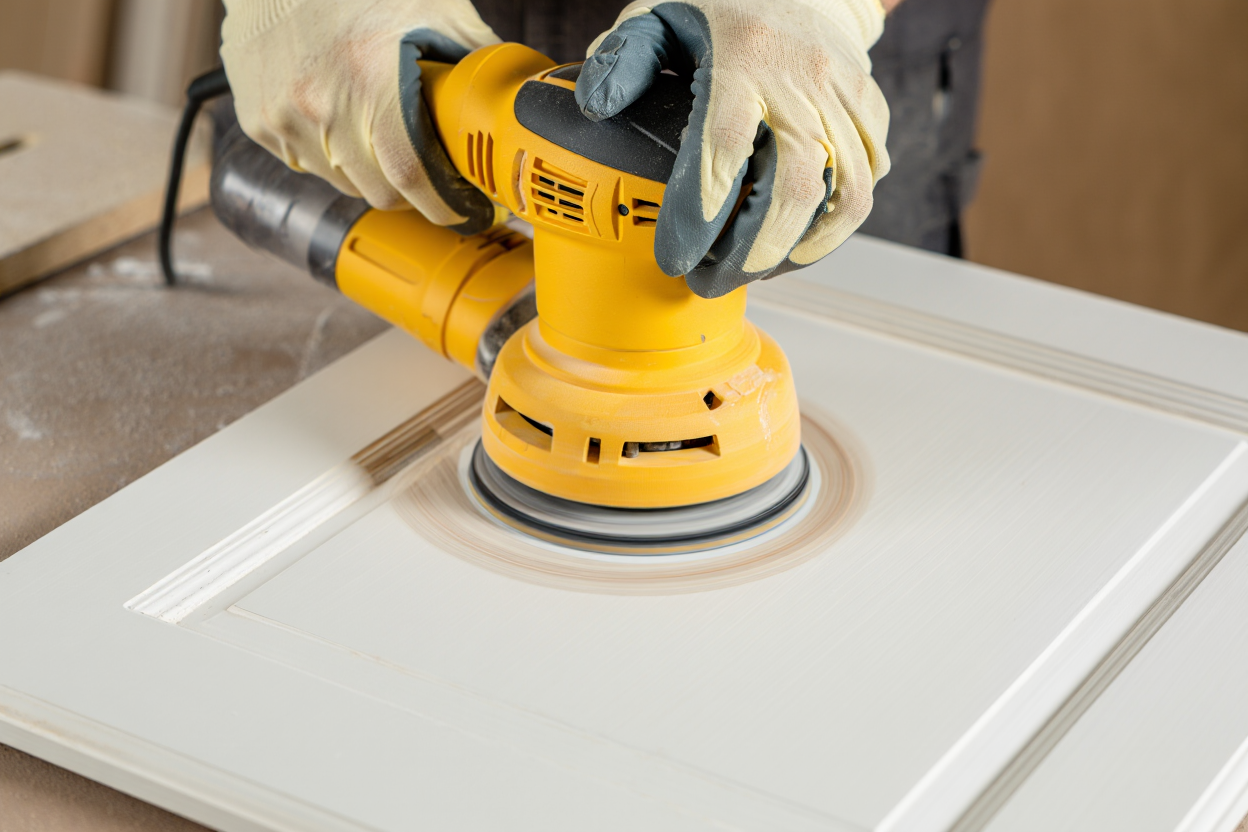
What Sanding Actually Does in Cabinet Painting
When we sand kitchen cabinets before painting, we’re solving three problems at once.
First, sanding creates mechanical adhesion. Paint needs something to grip. Glossy factory finishes or old polyurethane coatings are too smooth. The paint sits on top instead of bonding to the surface. Sanding creates microscopic texture that lets primer and paint lock in.
Second, sanding removes contaminants. Kitchens collect grease, especially above the stove. Even after cleaning with a degreaser, some residue remains embedded in the finish. Sanding cuts through that layer. It also removes minor surface damage, worn spots, and oxidation from years of use.
Third, sanding levels the surface. Cabinets develop inconsistencies over time. Previous coatings may have drips, brush marks, or uneven coverage. Oak cabinets have pronounced grain. We minimize that grain with multiple coats of primer, but sanding between coats ensures each layer bonds properly and builds an even surface.
For homeowners searching how to sand kitchen cabinets, understanding these three functions explains why the step matters.

What Happens If You Skip Sanding Kichen Cabinets
We just always see the same failures when cabinets aren’t sanded properly. These problems show up fast.
Peeling is the most common issue. Paint adheres to the existing finish, not to the wood underneath. When adhesion fails, entire sections lift off in sheets. This happens first in high use areas, around handles, near the dishwasher, along edges where hands grip regularly. Moisture accelerates the problem. A cabinet door that looks fine one week can have palm-sized sections of peeling paint the next.
Chipping follows the same principle. Without proper sanding, the paint film stays separate from the substrate. Any impact causes chips. Closing a cabinet door too hard. Setting a pot down on the counter near the cabinet face. Normal kitchen use becomes destructive.
The finish also stays uneven. Old coatings have texture. If you paint over them without sanding, every imperfection telegraphs through. Drips become visible bumps. Brush marks from previous paint jobs show as lines. The result looks unprofessional, even if you used quality paint.

Cleaning vs Sanding: Why Both Matter
Regularly homeowners often confuse cleaning with proper prep. Both are necessary, but they serve different purposes.
When we tell customers to clean grease off cabinets above the stove before we arrive, we’re removing the heaviest contamination. Grease jumps from cooking surfaces and settles on cabinet doors and frames, especially along top edges and in grooves. Customers wipe down cabinets, then wipe again with clean water to remove residue.
That cleaning is essential, but it doesn’t prepare the surface for paint. Cleaning removes the bulk of grease and grime. Sanding kitchen cabinets removes what’s left, plus it creates the texture needed for adhesion. Think of cleaning as gross removal and sanding as fine preparation.
For people researching how to clean and restore wood cabinets, the process is different from prep for repainting. Cleaning and restoration might involve wood cleaners, oils, or polishes to refresh the existing finish. Prepping for paint requires degreasing, then sanding to remove or dull that finish entirely.
We use both steps on every project. Clean first, then sand. Skip either step, and the results suffer.

How Professional Cabinet Painters Handle Sanding
Professional cabinet refinishing differs from DIY in consistency and dust management.
We sand every surface, even areas most people would skip. Inside edges, under cabinet door lips, the back sides of face frames. These areas may not be visible, but paint needs consistent adhesion everywhere. When amateurs sand, they often miss spots or rush through less obvious areas. Those become failure points.
We also control dust. Orbital sanders generate fine particles that settle everywhere in a kitchen. We set up containment with plastic barriers and use equipment with dust collection. Sanding without containment creates cleanup problems and gets dust into places it shouldn’t go, inside drawers, on countertops, into appliances.
Grit selection matters. We start with coarser grits on heavily worn cabinets or thick old finishes, then move to finer grits for the final surface. Most DIY sanders use whatever grit seems reasonable, often 120 or 150 throughout. That approach works on new wood but creates problems on existing finishes.
For cabinet painters near me serving Utah County, proper sanding technique is what separates lasting results from premature failure. We’re trained in these details. We sand systematically, not randomly.

When Refinishing Makes Sense vs Kitchen Cabinet Replacement
Sanding is part of the larger question: should you refinish or replace?
Refinishing makes sense when cabinet boxes are solid and doors are in good structural condition. If the wood isn’t warped, if joints are tight, if the boxes are square and level, then refinishing works. We sand, prime with multiple coats, then apply a durable finish. For Utah homes with quality older cabinets, this produces results that look and perform like new cabinets at a fraction of replacement cost.
We minimize oak grain with three to four coats of grain-filling primer. The grain almost disappears, though not completely. Customers who want a perfectly smooth surface on oak should understand that limitation. If that’s a deal-breaker, replacement might be better. For most people, minimized grain is acceptable.
Cabinets with serious structural damage, extensive water damage, or outdated configuration are better candidates for replacement. No amount of sanding fixes broken drawer boxes or cabinets that don’t fit the space properly.
For homeowners researching how to refresh wood cabinets without replacing everything, sanding and refinishing offers a middle ground. It requires less time and money than full replacement while producing dramatic visual improvement.
The Long-Term Result
Skipping sanding saves time initially. It costs more later. Paint that fails in the first year means either living with damaged cabinets or paying to redo the work. Get a free quote on a complete cabinet painting job that’s done right, the very first time.
Get a Free Quote
"*" indicates required fields