Are you looking to give your kitchen a facelift with refinished cabinets but need help figuring out where to start? You’re in luck. In this article, we will provide you with a step-by-step guide on how to refinish your cabinets and what to do to maintain them afterward to keep them looking new for years to come.
Refinishing Kitchen Cabinets
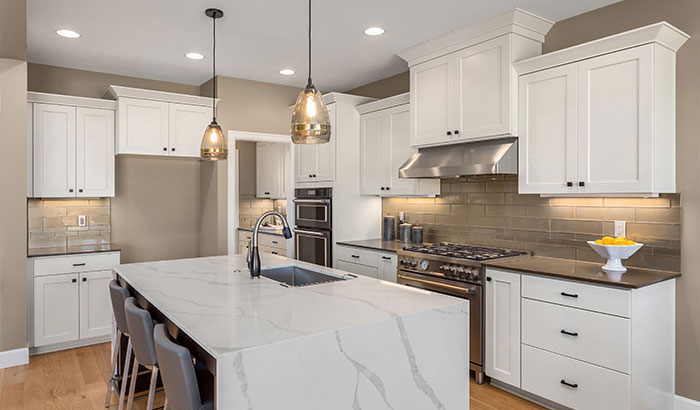
Refinishing kitchen cabinets is a great way to update the look of your kitchen without having to replace the cabinets entirely. Refinishing cabinets involves removing the old finish and applying a new one, giving your cabinets a fresh look. This process can be time-consuming, but the results are worth it.
Here are 30 start-to-finish steps to take to achieve beautifully refinished kitchen cabinets:
Step 1: Remove the Doors and Hardware
The first step in refinishing your kitchen cabinets is to remove the cabinet doors and any hardware, such as knobs and handles. This will make working on the cabinets easier and ensure an even finish. Label each door and element of hardware, so you know where each piece goes when it’s time to reassemble.
Step 2: Clean the Cabinets
Once the doors and hardware are removed, it’s time to clean the cabinets thoroughly. This will remove any dirt, grime, and grease that accumulated on the cabinets over time. Use warm water and dish soap to clean the cabinets, then dry them with a clean cloth.
Step 3: Sand the Cabinets
Next, you will need to sand the cabinets to remove the old finish and prepare them for the new finish. Use medium-grit sandpaper to sand the cabinets, making sure to sand in the direction of the grain. Sanding will also help to smooth out any imperfections in the wood.
Step 4: Fill any Holes or Cracks
If your cabinets have holes or cracks, fill them with wood filler. Use a putty knife to apply the filler and let it dry completely. Once the filler is dry, sand it smooth with fine-grit sandpaper.
Step 5: Sand Again
After filling any holes or cracks, sand the cabinets again with fine-grit sandpaper. This will ensure the surface is smooth and ready for the new finish.
Step 6: Apply Primer
Next, it’s time to apply primer to the cabinets. Use a paintbrush to apply a thin coat of primer to the cabinets, making sure to cover the entire surface. Allow the primer to dry completely before moving on to the next step.
Step 7: Sand the Primer
Once the primer is dry, sand it lightly with fine-grit sandpaper. This will help to smooth out any imperfections and create a smooth surface for the new finish.
Step 8: Apply the First Coat of Paint or Stain
Now it’s time to apply the first coat of paint or stain to the cabinets. Use a paintbrush to apply a thin coat of paint or stain to the cabinets, making sure to cover the entire surface. Allow the first coat to dry completely before applying the second coat.
Step 9: Sand Between Coats
After the first coat is dry, sand the cabinets lightly with fine-grit sandpaper. This will help to smooth out any imperfections and create a smooth surface for the second coat.
Step 10: Apply the Second Coat of Paint or Stain
Once the cabinets are sanded, apply the second coat of paint or stain. Use a paintbrush to apply a thin coat, making sure to cover the entire surface. Allow the second coat to dry completely before moving on to the next step.
Step 11: Apply a Third Coat (If Necessary)
Depending on the type of paint or stain you are using, you may need to apply a third coat. Follow the same process as the second coat, allowing each coat to dry completely before applying the next one.
Step 12: Apply a Clear Coat
Once the final coat of paint or stain is dry, apply a clear coat to protect the cabinets and give them a glossy finish. Use a paintbrush to apply the clear coat, making sure to cover the entire surface. Allow the clear coat to dry completely before moving on to the next step.
Step 13: Reattach the Hardware
After the cabinets are completely dry, it’s time to reattach the hardware. Use the labels you created earlier to make sure each piece goes back in the right place.
Step 14: Reattach the Doors
Now it’s time to reattach the cabinet doors. Use a screwdriver to attach the hinges to the doors, and then attach the doors to the cabinets. Make sure the doors are aligned correctly and open and close properly.
Step 15: Clean Up
Once everything is reassembled, it’s time to clean up. Dispose of any used sandpaper, brushes, or other materials. Clean up any paint or stain that may have gotten on the floor or countertops.
Step 16: Allow the Cabinets to Cure
It’s essential to allow the cabinets to cure completely before using them. This can take anywhere from a few days to a week or more, depending on the type of paint or stain used. During this time, avoid touching or using the cabinets.
Step 17: Maintain the Cabinets
Once the cabinets are cured, it’s important to maintain them properly to keep them looking great. This includes wiping them down regularly with a soft cloth and mild soap, avoiding abrasive cleaners or scrubbers that can damage the finish, and wiping up spills and stains immediately.
Step 18: Avoid Extreme Temperatures
Avoid exposing the cabinets to extreme temperatures or humidity, which can cause the wood to expand or contract and damage the finish.
Step 19: Avoid Direct Sunlight
Direct sunlight can also damage the finish on your cabinets over time, so it’s important to avoid exposing them to direct sunlight.
Step 20: Use Protective Pads and Liners
To protect the finish on your cabinets, use protective pads or liners under dishes, glasses, and other items that may scratch the surface.
Step 21: Refinish as Needed
Over time, the finish on your cabinets may wear or fade. When this happens, you can refinish the cabinets again to restore their appearance.
Step 22: Choose the Right Finish
When choosing a new finish for your cabinets, consider the type of wood and the style of your kitchen. There are a variety of finishes to choose from, including paint, stain, and varnish.
Step 23: Consider Professional Refinishing
If you’re not comfortable refinishing your cabinets yourself, consider hiring a professional. They can ensure the job is done correctly and the cabinets look great.
Step 24: Protect Yourself
If you decide to refinish your cabinets, protect yourself by wearing gloves, a mask, and safety glasses.
Step 25: Work in a Well-Ventilated Area
Make sure to work in a well-ventilated area to avoid inhaling fumes from the paint or stain.
Step 26: Take Your Time
Refinishing cabinets is a time-consuming process, so make sure to take your time and follow each step carefully.
Step 27: Enjoy Your New Cabinets
Once your cabinets are refinished, take a step back and admire your handiwork. Your kitchen will look brand new, and you’ll be able to enjoy your updated cabinets for years to come.
Step 28: Consider Other Updates
If you’ve refinished your cabinets and are still looking for more ways to update your kitchen, consider other updates, such as new countertops or flooring.
Step 29: Get Inspired
Plenty of resources are available online or in magazines to help you get inspired for your kitchen renovation.
Step 30: Consult with Professionals
Consult with professionals to ensure that your kitchen renovation is done safely and effectively,
Congratulations on your newly refinished cabinets! Proper maintenance will help ensure they stay looking beautiful for years to come, which leads us to the following:
Tips on How To Maintain Your Refinished Kitchen Cabinets:
- Avoid harsh chemical cleaners and Wipe your cabinets regularly with a damp cloth to remove dust and debris.
- Use a microfiber cloth to dry the cabinets after wiping them down to avoid streaks.
- Avoid using abrasive scrubbers on your cabinets, such as steel wool, as they can scratch the finish.
- Avoid exposing your cabinets to excessive moisture. If they get wet, wipe them down immediately with a dry cloth.
- Keep your cabinets away from heat sources, such as stovetops and ovens, as heat can damage the finish.
- If your cabinets have hardware, such as knobs and pulls, check them regularly to ensure they are secure. Tighten any loose screws or bolts.
- Avoid slamming cabinet doors and drawers, as this can cause damage to the finish and hardware.
- If you have cabinet liners, remove them periodically and clean them with mild soap and water before replacing them.
- If your cabinets are near a window, use curtains or blinds to protect them from direct sunlight, which can cause the finish to fade.
- If you spill anything on your cabinets, clean it up immediately with a damp cloth.
- Avoid using wax on your cabinets, as it can build up over time and make cleaning difficult.
- If your cabinets have glass doors, clean the glass with a non-abrasive cleaner and a soft cloth.
- If your cabinets have a high-gloss finish, use a non-abrasive polish to keep them looking shiny.
- If you have cabinets with a natural wood finish, use a wood cleaner and polish to protect the wood and keep it looking beautiful.
- If you have cabinets with a painted finish, use a non-abrasive cleaner specifically designed for painted surfaces.
- If your cabinets have an oil-rubbed bronze finish, use a non-abrasive cleaner and a soft cloth to keep them looking beautiful.
- If you have cabinets with a matte finish, use a non-abrasive cleaner and a soft cloth to clean them.
- If your cabinets have a distressed finish, avoid using anything abrasive, as it can remove the distressed look.
- If your cabinets have decorative molding or trim, clean them with a soft-bristled brush or a damp cloth.
- If your cabinets have metal accents, such as brass or nickel, clean them with a non-abrasive cleaner and a soft cloth.
- Avoid using vinegar or ammonia-based cleaners on your cabinets, as they can damage the finish.
- If your cabinets have a glossy finish, avoid using a polish with silicone, as it can create a hazy film on the surface.
- If you have cabinets with a lacquered or laminate finish, use a non-abrasive cleaner specifically designed for lacquered surfaces.
- Avoid using oil-based cleaners on your cabinets as they can leave a residue and attract dust and debris.
- If your cabinets have a natural wood finish, avoid using water on them, as it can cause the wood to warp or crack.
- If you have any doubts about cleaning or maintaining your cabinets, consult the manufacturer.
Allen Brothers Cabinet Painting Can Help
If you’ve found yourself asking, “Should I refinish my cabinets?” for a long time, we can help you make that final call. If you live in Draper, Sandy, South Jordan, West Jordan, or Salt Lake City, we can give you a free estimate, and we can offer suggestions of colors, and answer questions you have about paint vs. stain and other options.
Updating your kitchen should be an enjoyable and rewarding experience for you. Contact us today to ensure your cabinet refinishing is done well and in a way that you’ll enjoy for years to come.